Table of Contents
This post shows how you can use Rclone to back up your data from a Synology NAS to a storage bucket in GCP.
Why Backing Up Synology NAS
Backing up data is like wearing a seat belt when driving, where nothing bad happens 99% of the time. However, when the 1% strikes unexpectedly one day, the “future” you will be grateful that you do not lose any precious data, such as childhood photos, important documents, etc.
When you own several machines at home, it makes sense to centralize the shared data in a local NAS, such as Synology NAS. You may also configure Time Machine to seamlessly back up each Mac to Synology NAS every weekend. It is equally important to back up the data in Synology NAS to the cloud. Your car’s seat belt might be faulty, but you still have an airbag. If a thief breaks into your house, steals your shiny NAS, and burns your house down, you still have your data in the cloud.
The moral of the story is always to back up your data, preferably using the 3-2-1 rule.
Why Rclone
The most confusing part of the Synology NAS backup process is there are several ways to do this. The three popular solutions are Cloud Sync, Hyper Backup, and Rclone. Each solution allows us to push data to various cloud providers. This Reddit post nicely sums it all up. If I can summarize the most significant disadvantage of each solution in a few words, it will be:
- Cloud Sync silently ignores file names with unsupported characters.
- Hyper Backup landlocks you to Synology solution because you can’t browse the backed-up files in the cloud.
- Rclone doesn’t have a pretty GUI.
Rclone seems more palatable among these solutions because I know all my data will be backed up. When disaster strikes next time, I also don’t have to deal with the proprietary format during my data recovery process. Who knows if Synology will still be around 20 years from now?
Why GCP
In the past, I configured my Synology NAS to perform a seamless backup to CrashPlan using this Docker solution. It has worked flawlessly for many years. The main reasons I want to move the backups to my personal GCP org are:
- I have free GCP credits. Even without the GCP credits, based on the GCP Pricing Calculator, it is still cheaper to back up my data to a regional Archive storage bucket than CrashPlan.
- I can customize the number of backup versions and retention policies.
- It is faster to recover all my data if needed.
- I want to secure the data and GCP resources myself.
You can swap out GCP with a cloud provider of your choice. For example, you can use Rclone to back up all your photos to Amazon Photos for free if you have a Prime membership and your photo formats are supported. My RAW images (supported) also have corresponding XMP files (not supported), and I want to back up other file formats too.
Configuration
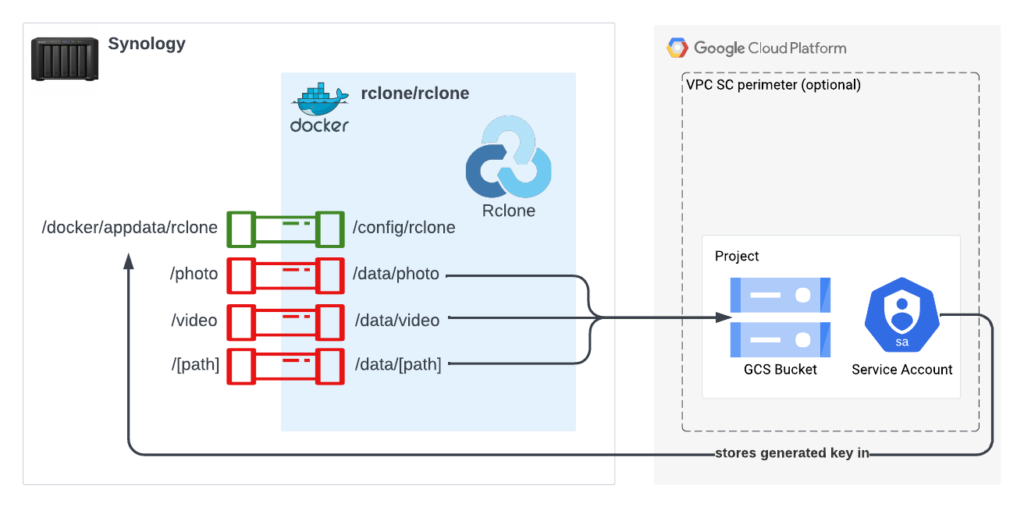
This diagram below helps you to visualize the solution.
Setting up GCP Resources
The best way to secure the data backups is to create a separate GCP project where only a specific service account has sufficient permission to write to a storage bucket. At a high level:
- Create a GCP project.
- Create a storage bucket.
- Enable object versioning and limit them to N versions (to prevent rising storage costs).
- Create a service account.
- Grant service account with Storage Object Admin (roles/storage.objectAdmin) at the project level.
- Create a service account key.
- Download the service account key file in JSON format to the local machine first. In this post, this file is named service-account.json.
- BONUS: If you are paranoid, configure a VPC Service Control perimeter and put that project within the perimeter. This ensures only the whitelisted IPs can access these project resources. This way, even if the service account key is compromised, adversaries cannot access the protected resources unless they also spoof the IPs.
Setting Up Rclone in Synology NAS
Ways to Install Rclone
There are multiple ways to install Rclone in Synology NAS:
- Install Rclone directly in Synology NAS.
- Install Rclone using Docker (rclone/rclone).
- Install Rclone with GUI using Docker (romancin/rclonebrowser).
In this post, I use the second solution (without GUI) because simpler implementation means less chance of the tool breaking in the future. Besides, this is a “set-and-forget” process, and I don’t need to use the GUI most of the time.
What’s in /docker/appdata/rclone
/docker/appdata should already exist when the Docker package is installed in Synology NAS. You only need to create a child folder named rclone (or any name you like). This folder contains three files:
- excludes.txt = File patterns to be excluded from the backup process.
- rclone.conf = Rclone configuration.
- service-account.json = The service account key file that you downloaded to your local machine from GCP.
Here’s my example of excludes.txt, and customize it to your needs:
@eaDir/**
.**
rclone.conf can be generated using rclone config command. However, that must be done outside Synology NAS (i.e., on your local machine). That said, most of this command’s interactive steps are unnecessary since you created the storage bucket earlier. All you need is exactly this and nothing else:
[gcp]
type = google cloud storage
service_account_file = /config/rclone/service-account.json
Downloading Docker Image
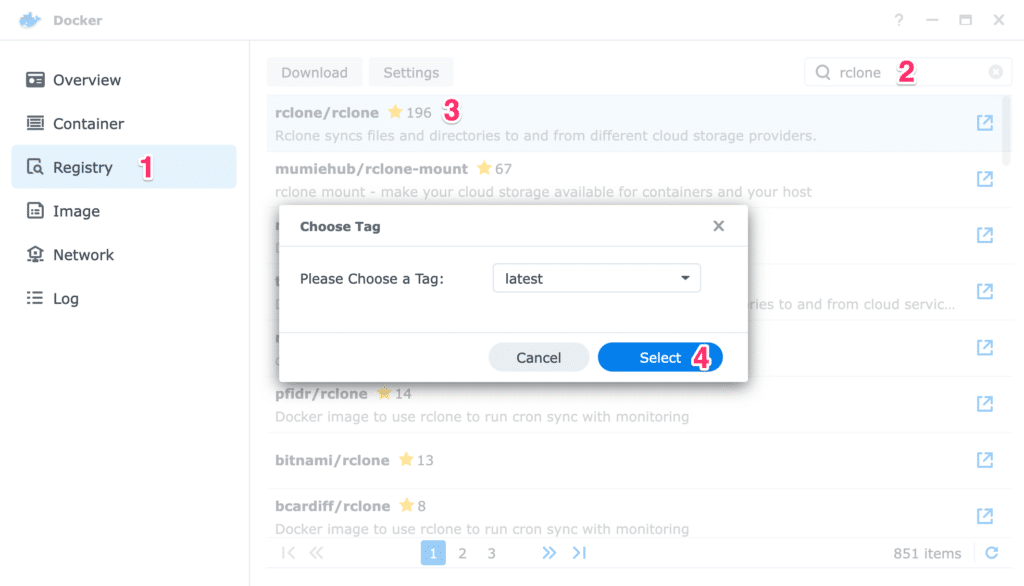
Go to DSM > Docker to download rclone/rclone image.
Creating Docker Container (with –dry-run)
This step ensures the Rclone is configured properly before any files are copied to the storage bucket to prevent incurring unnecessary costs.
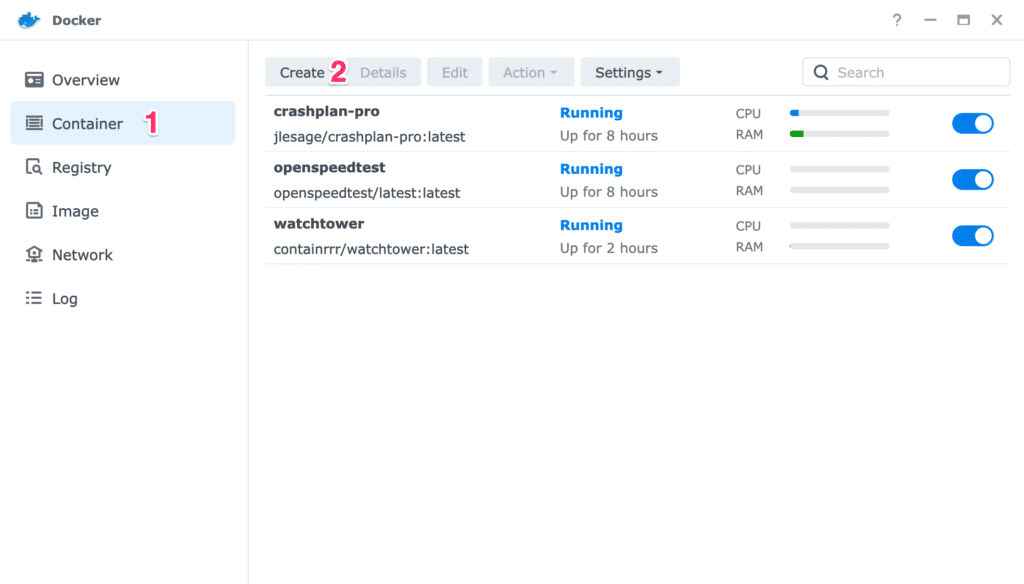
First, create a new container.
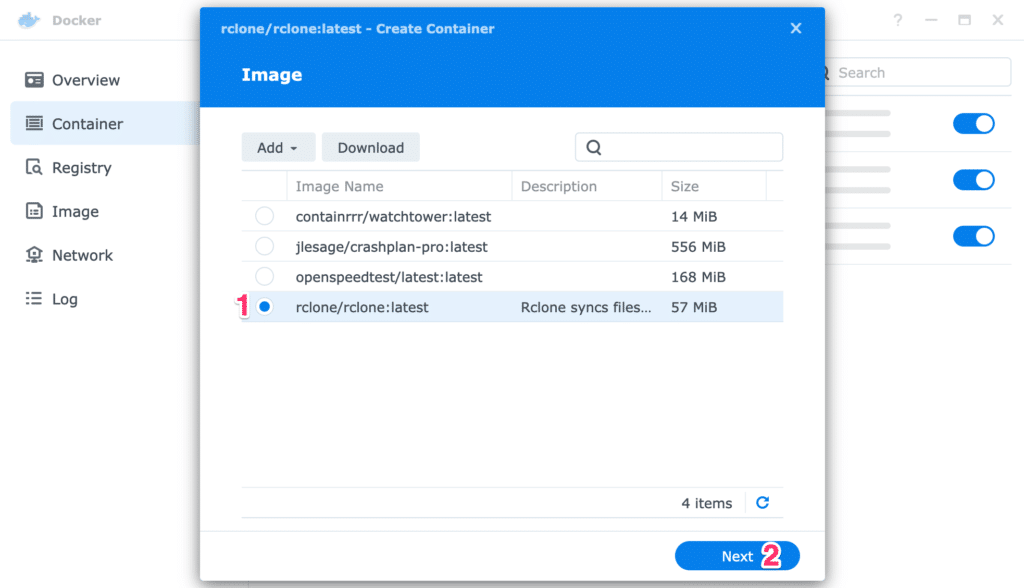
Use rclone/rclone image.
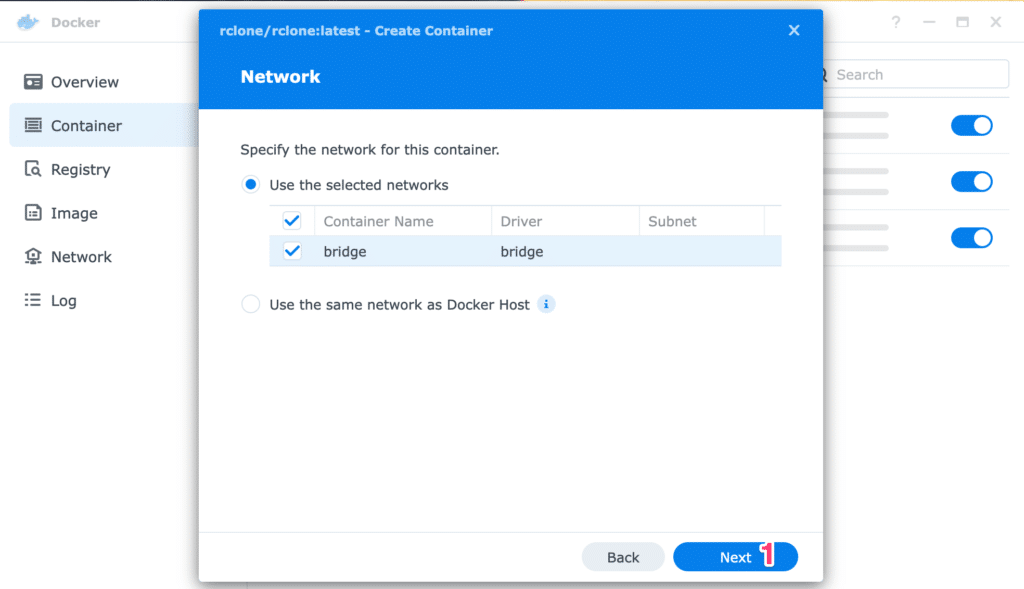
No changes to the network settings.
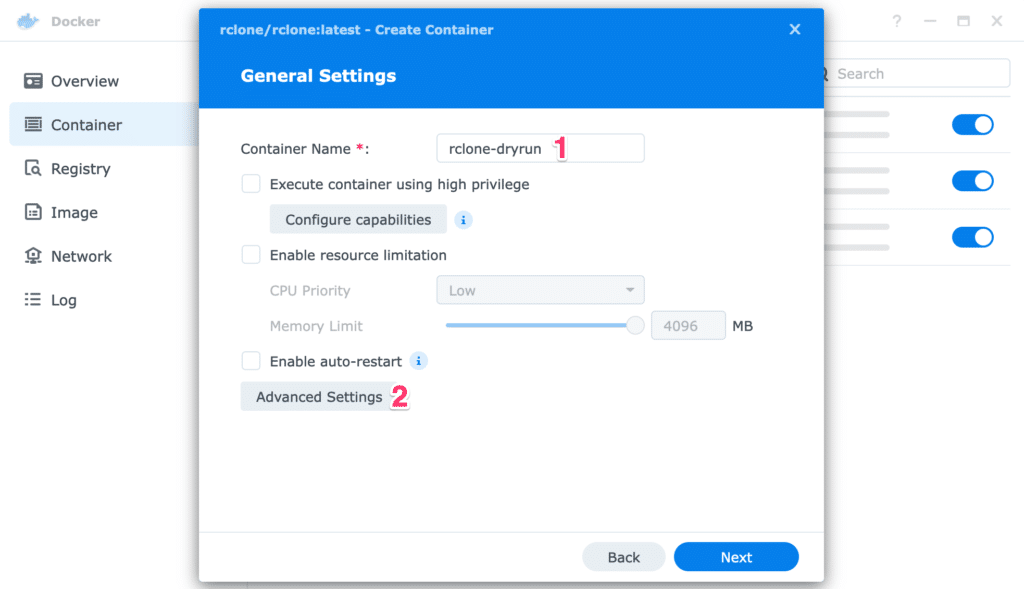
Enter the container name, and go to Advanced Settings.
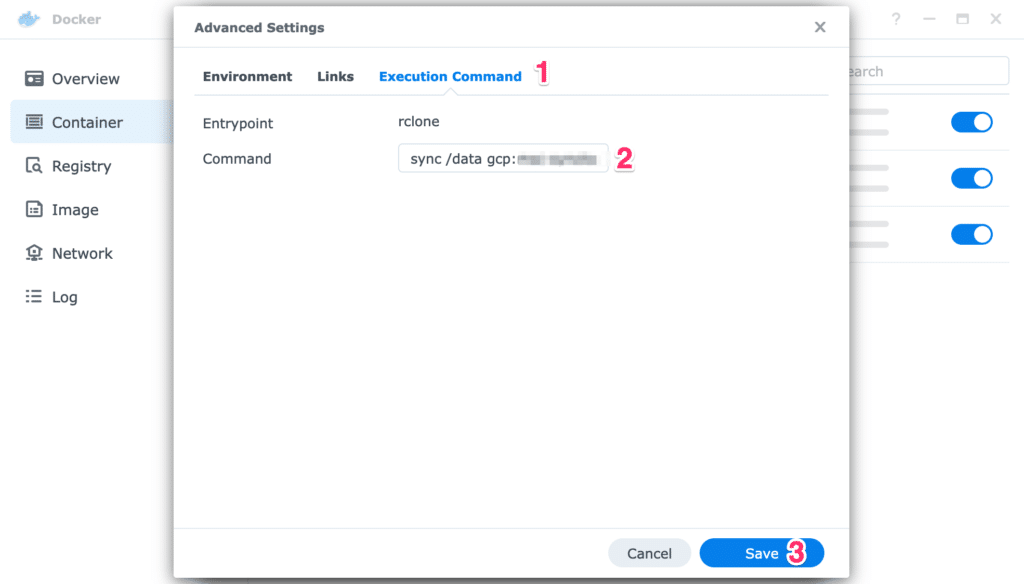
Under Execution Command, enter the following command:
sync /data gcp:[BUCKET_NAME] --exclude-from /config/rclone/excludes.txt --gcs-bucket-policy-only --verbose --dry-run
Replace [BUCKET_NAME] with your own bucket name.
IMPORTANT: Synology does not allow us to edit the execution command after creating a container!
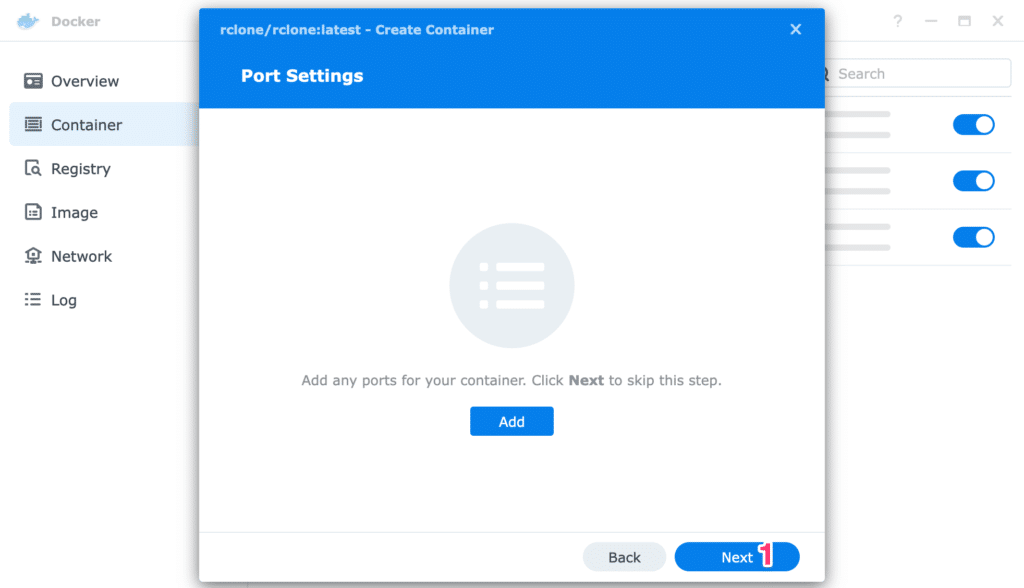
No changes to the port settings.
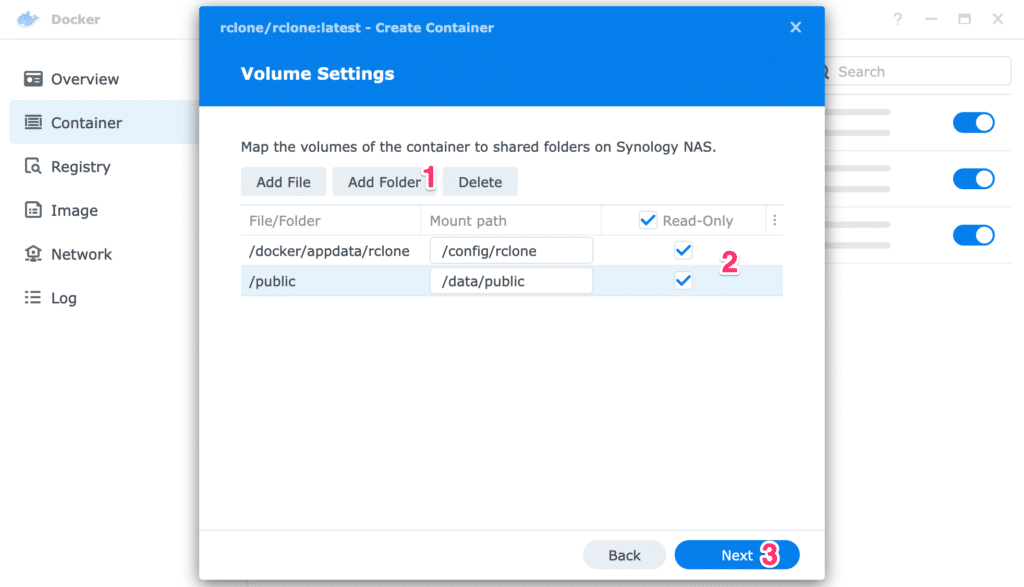
Define the volume mounts:
- /config/rclone = contains the Rclone configuration files.
- /data = contains data to be backed up.
- Because you can’t perform a volume mount on root /, each root folder needs to be volume-mounted to a subfolder within /data that you wish to back up.
TIP: Consider mounting a data folder with the least amount of data when doing the dry run test. You can add/remove folders on an existing container later.
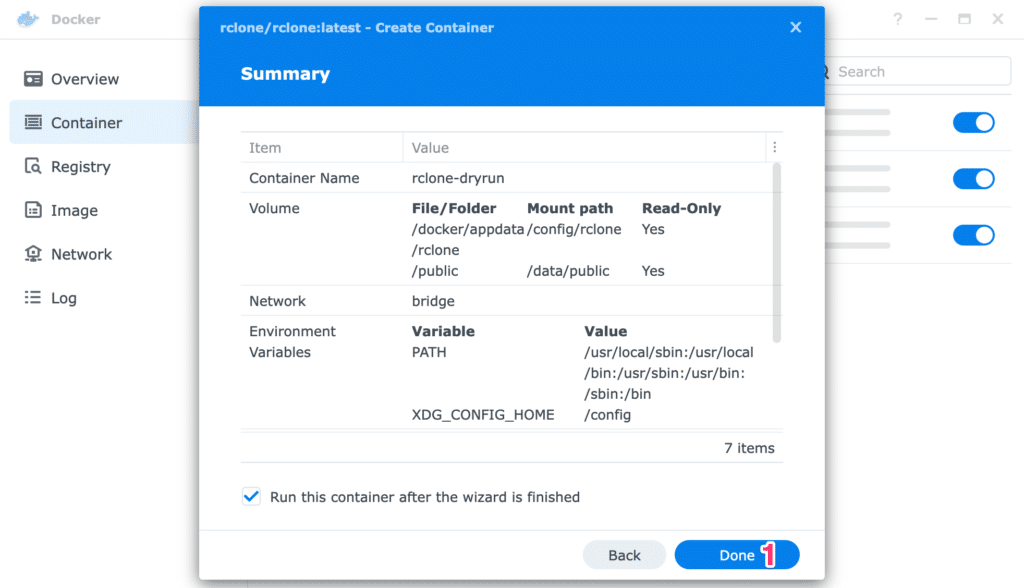
Review the summary.
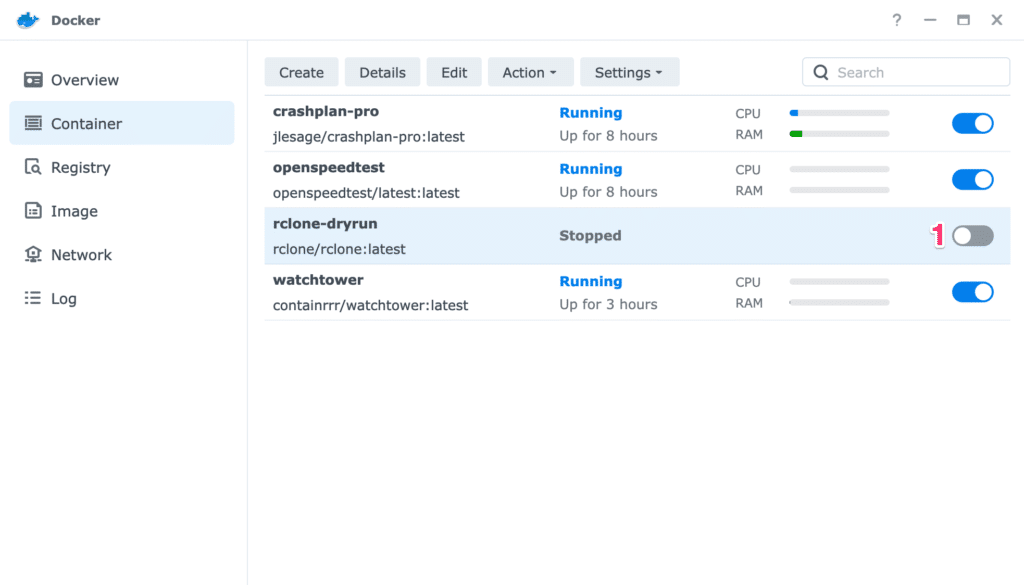
Once the container is created, click on the toggle to run it.
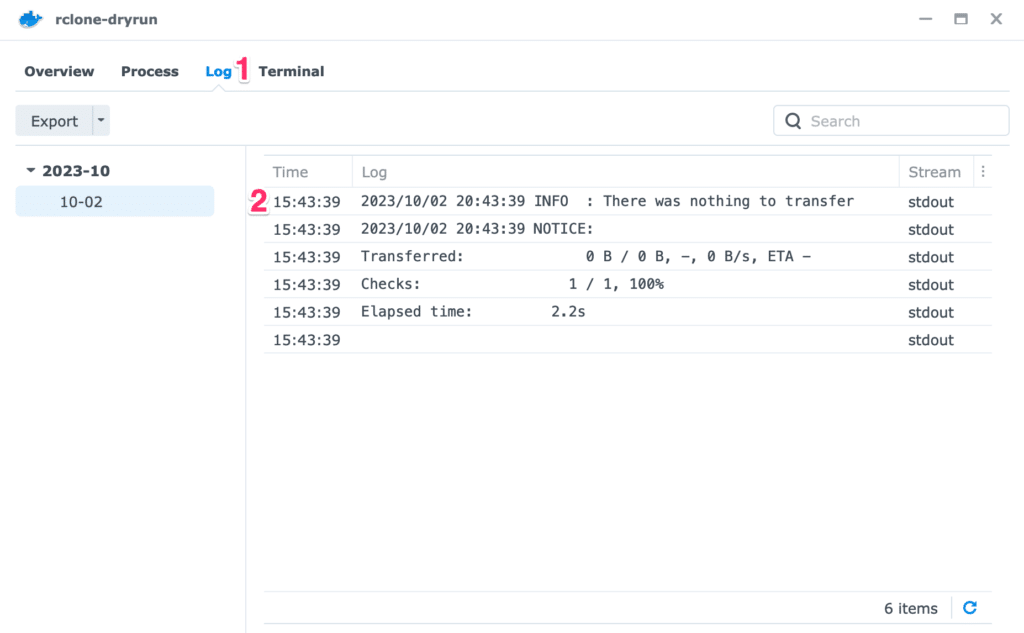
Review the container log. You can drop a few files into the mounted folder and rerun the container. The files should show up in the log.
Creating Docker Container (without –dry-run)
Now that you have a working container to perform the dry run test, it’s time to back up the data to the cloud.
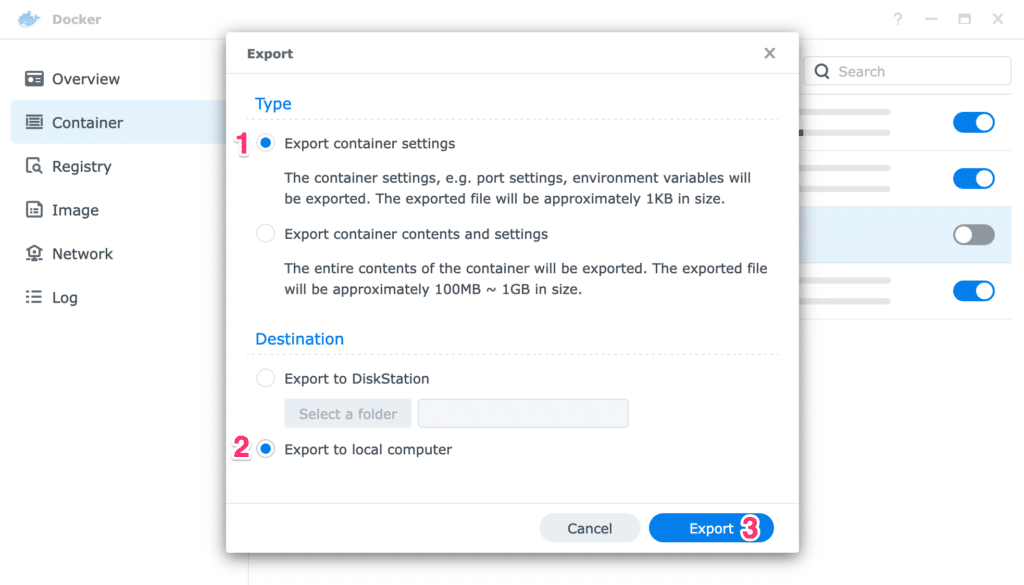
As mentioned earlier, it is not possible to edit the existing container’s execution command. The existing container contains the –dry-run flag on the execution command. The simplest way is to export the container setting, which will be used to create a new container without the –dry-run flag.
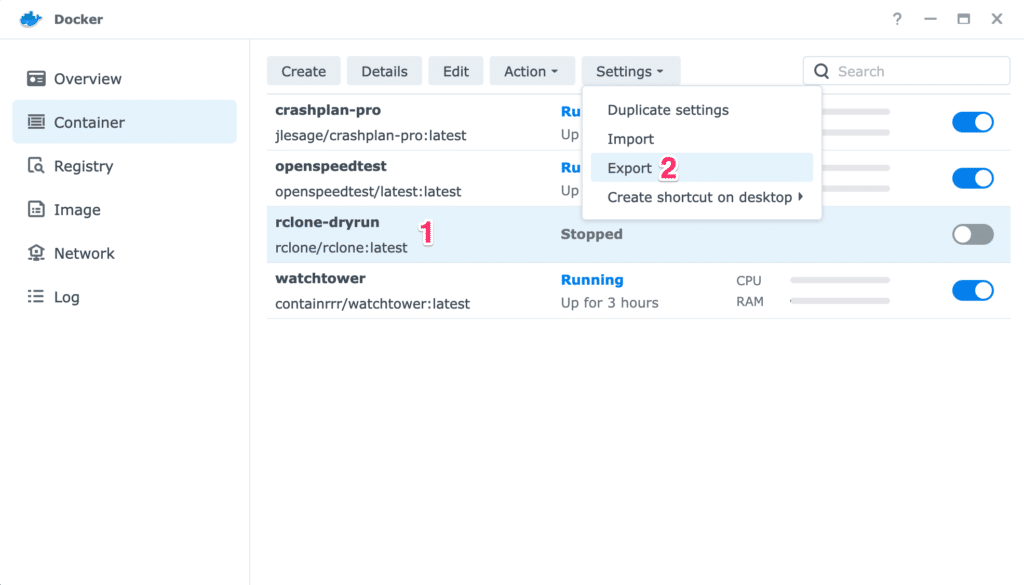
Export just the container settings to a local machine.
Open the JSON file, locate and remove –dry-run from cmd. Save the file.
{
   "CapAdd" : [],
   "CapDrop" : [],
   "cmd" : "sync /data gcp:[BUCKET_NAME] --exclude-from /config/rclone/excludes.txt --gcs-bucket-policy-only --verbose --dry-run",
   "cpu_priority" : 0,
   "enable_publish_all_ports" : false,
   ...
}
Return to the Docker container window to import this JSON file to create a new container.
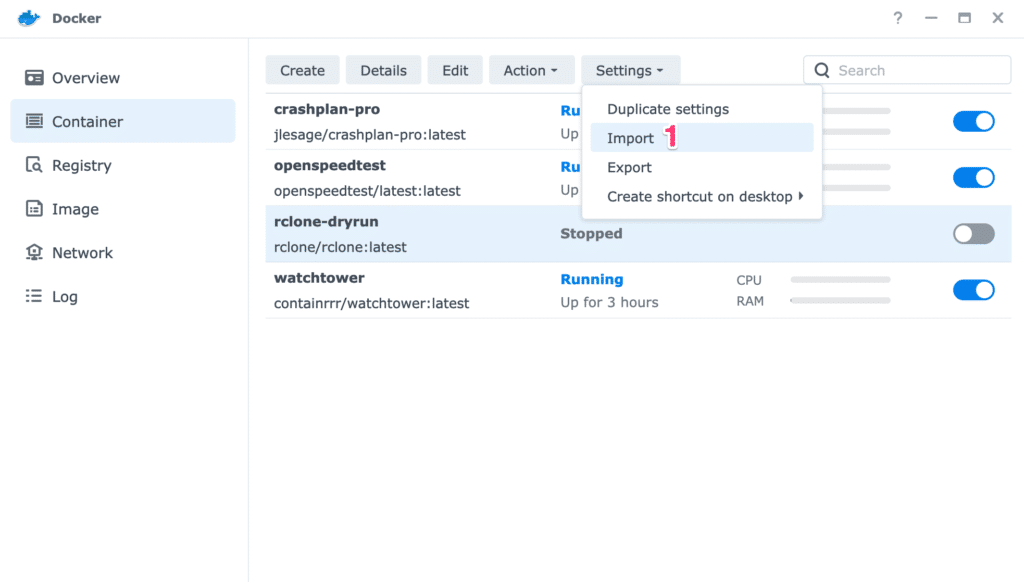
Upload the modified JSON file and provide a new container name.
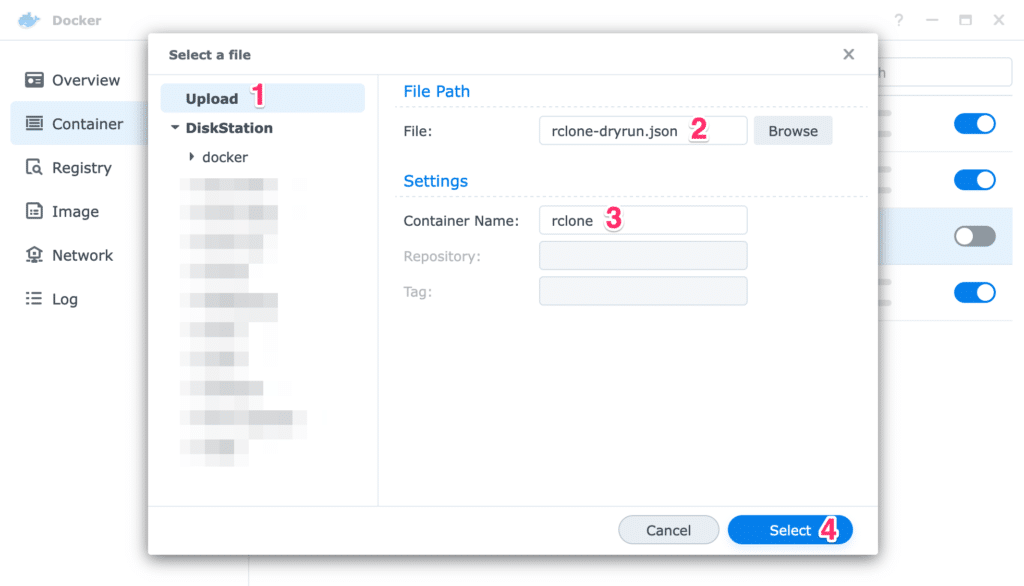
Now, there are 2 Rclone containers: one with the –dry-run flag and another without it. It is up to you whether to retain or delete the container with the –dry-run flag.
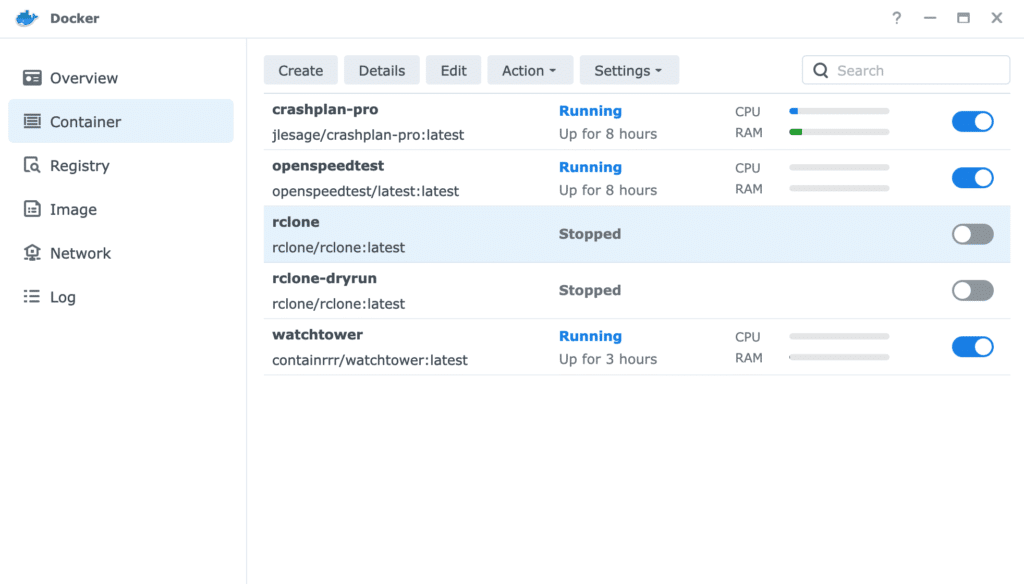
Scheduling Docker Container to Run
To ensure the Rclone runs to back up the files to the cloud, create a task scheduler. In this example, a triggered task is created so that Rclone can perform the backups on boot-up.
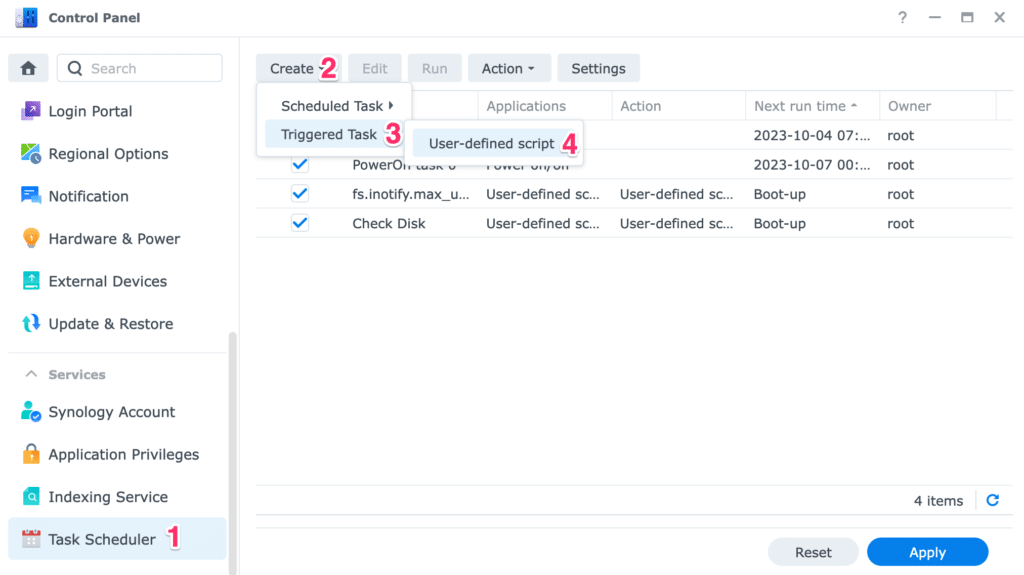
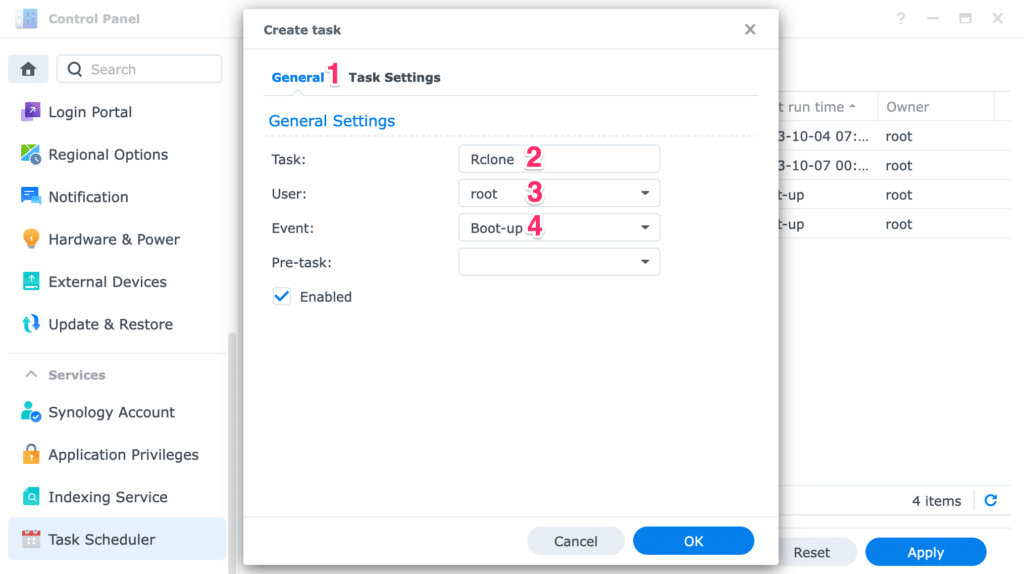
Ensure to run the task as root.
Specify the following script to execute. This script ensures the Docker service is running first before starting the container to perform the backup.
while (synopkg status Docker | jq -r '.status' | grep -vq "running"); do
  sleep 10
done

docker container start rclone
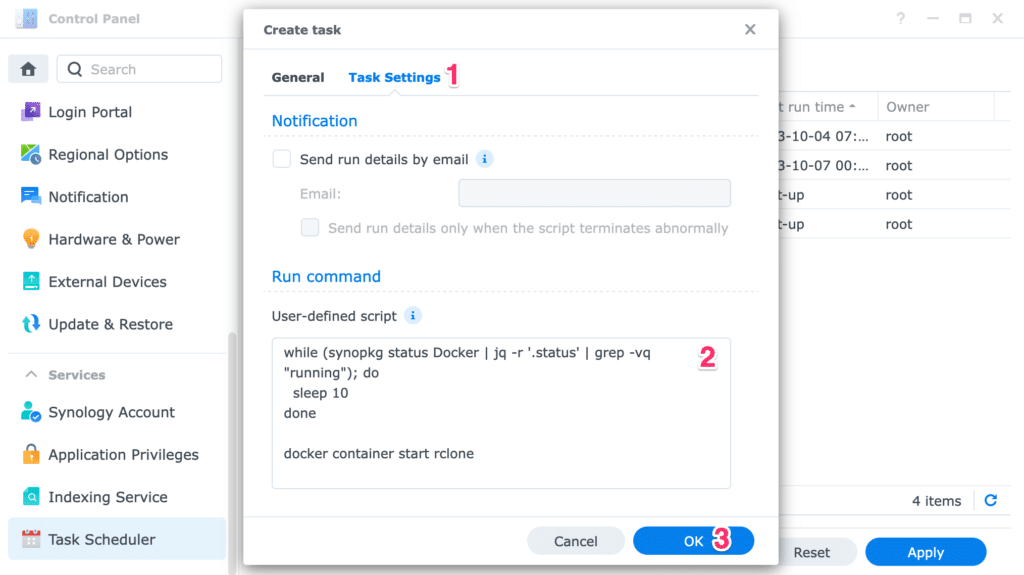
That’s it! Every time the Synology NAS boots up, the Rclone container will run to perform any necessary data backup to the cloud.
Leave a Reply